skip to main |
skip to sidebar
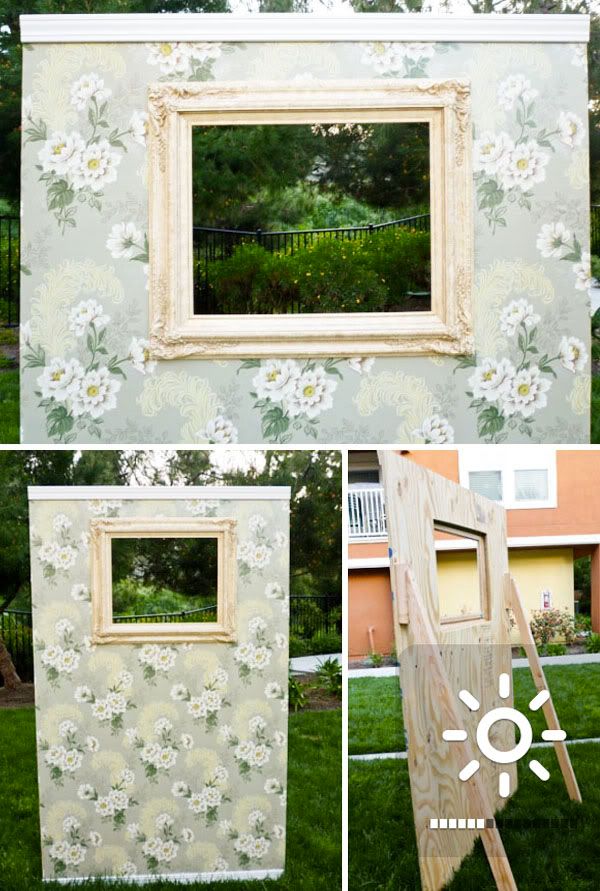
My husband has been getting more into projects around the house as he loves the idea of being a handy man. :) I think it is best to start small with a project like this, rather then practicing on something he can actually destroy. I am going to add this fun "Photobooth Wall" to the Honey-Do list. I hope he is as keen on creating it as I am.
I love the concept and know you can spice it up in so many different ways! Just simply changing the wall paper alone will give it such a different look. Then think of all the fun things you can add to embellish it! Oh so fun....
What you’ll need:
- Plywood (all wood and tools from Home Depot)
- (2) 2’x3’ Wood beams
- Sawhorse
- Ruler/Measuring tape
- Hammer and nails
- Wood screws
- Handheld jigsaw
- Handheld drill
- Mod Podge
- Paintbrush
- Waterproof sealant
- Vintage picture frame (I got mine at a thrift store)
- Vintage wallpaper (eBay)
- Floor molding (optional)
Instructions:
Step 1: The plywood usually comes in a 4’x8’ sized sheet. To make it easier, have the store cut the top for you – we asked for a 19” cut to make the final height 6’5”.
Step 2: Lay your plywood flat on the sawhorse. Measure your picture frame. Make sure you start your measurements near the middle of the frame itself – you don’t want the plywood to show on the inside of the frame, nor would you want gaps around the outside of the frame! Decide where you want your frame to be, and draw your measurements on the wood.
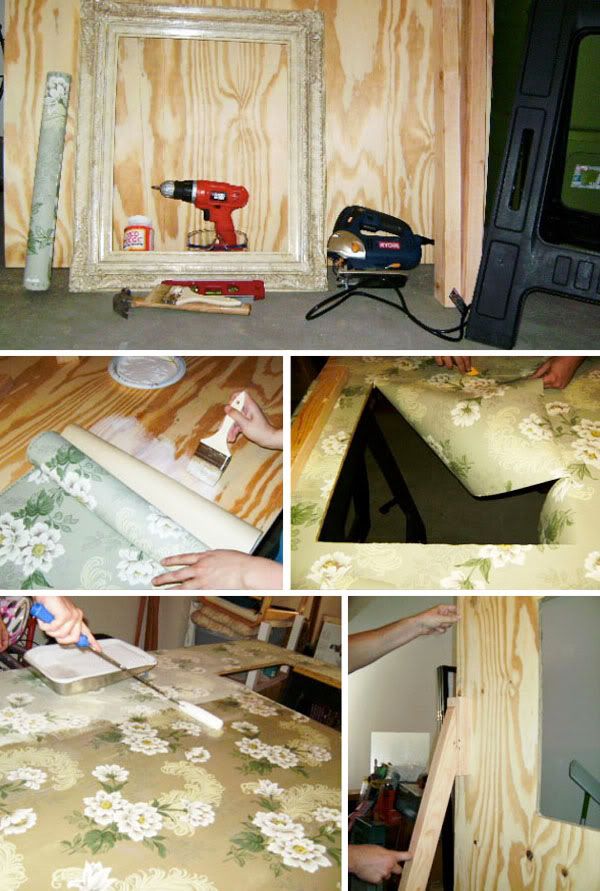
Step 3: Use a drill bit large enough to make a hole the width of the jigsaw blade in all corners of your measurements on the plywood. Now use the handheld jigsaw to cut out the entire shape.
Step 4: Stand the plywood upright. Cut each of your beams to about 5’ high. Measure and cut a 70 degree angle off the top of the beam. Hold this up to your wood frame until the angle lies completely flat against the block. Now take a ruler and place it horizontally on the ground, against the bottom of the beam, and use it to draw a line against the wood. Cut with the jigsaw – this will make the bottom of the beam level with the ground. Using the excess wood, cut (2) 10” pieces to use as mounting blocks. On the “back” of the frame, nail a mounting block onto each side. Make sure you hammer the nails through the front, so the heads are flush with the wood. Set the (2) beams aside for later.
Step 5: Lay your frame back onto the sawhorse. Measure and cut your wallpaper to size. Working with one strip at a time, brush your mod podge (what I had on-hand, but if you have wallpaper paste, that would probably work well, too) onto the top third of the wood. Line up and press your wallpaper onto it. Run over the surface with a ruler or other flat object to make sure there are no air pockets. Repeat for the middle and bottom third and all remaining strips of wallpaper until the entire front of the wood is covered. Let dry for at least 24 hours.
Step 6: Brush a thin layer of waterproof sealant over the entire surface of the wallpaper. Let dry for at least 24 hours.
Step 7: Optional: We really wanted to make it look like a piece of an actual wall, so we cut (2) 4’ long pieces of floor molding and attached one to the top and bottom of the wood frame, with Gorilla Glue.
Step 8: Stand the wood frame upright. Take one of the 5’ beams that you cut earlier and line it up against one of the mounting blocks. Drill 2 pilot holes (one on top, one 4 to 6 inches directly below the first hole) through the beam and partly into the mounting block. Next, screw the wood screws into the pilot holes. We used a 2” screw for the top (the thinner part of the beam) and a 2 3/4” screw for the bottom. Repeat for the other side.
Step 9: Mount your picture frame over the hole. Whew, you’re done! Now take your new “photobooth” somewhere pretty and snap away!
Photo Credit: Ruffled


